
Getting Started Guide
Everything you need to connect GetTranslated to your editor, CLI, or CI/CD — and keep every release localized across 80+ languages.
Quick Start Guide
Get up and running with GetTranslated.AI in just a few simple steps! It's easy to get started, and our platform SDK provides advanced functionality for all your translation needs.
Create Account
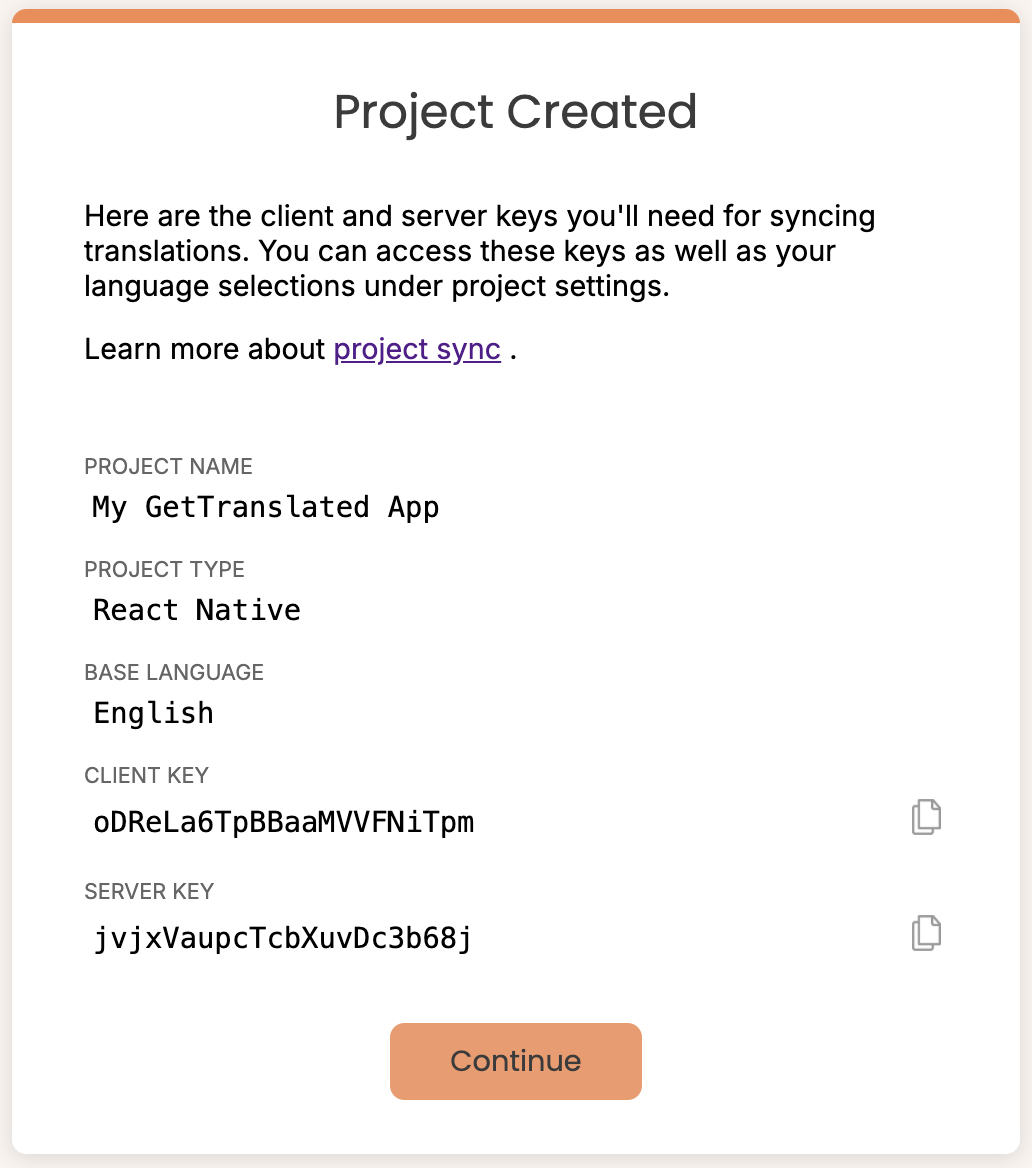
Welcome to GetTranslated.AI, we're happy you're here! The first step in translating your application is to sign up and create your first project. After setting up the project you'll receive 2 API keys. Don't worry if you forgot to save them, you can access them at any time in your project settings.
Here's a bit about each key:
- Client API Key is built into your application and used for dynamic translations, customization, and analytics.
- Server API Key is used to sync resources to & from your applications and can be integrated into your CI/CD pipeline.
If you don't already have an account, you can sign up here. We'll be here when you're ready.
Configure Languages
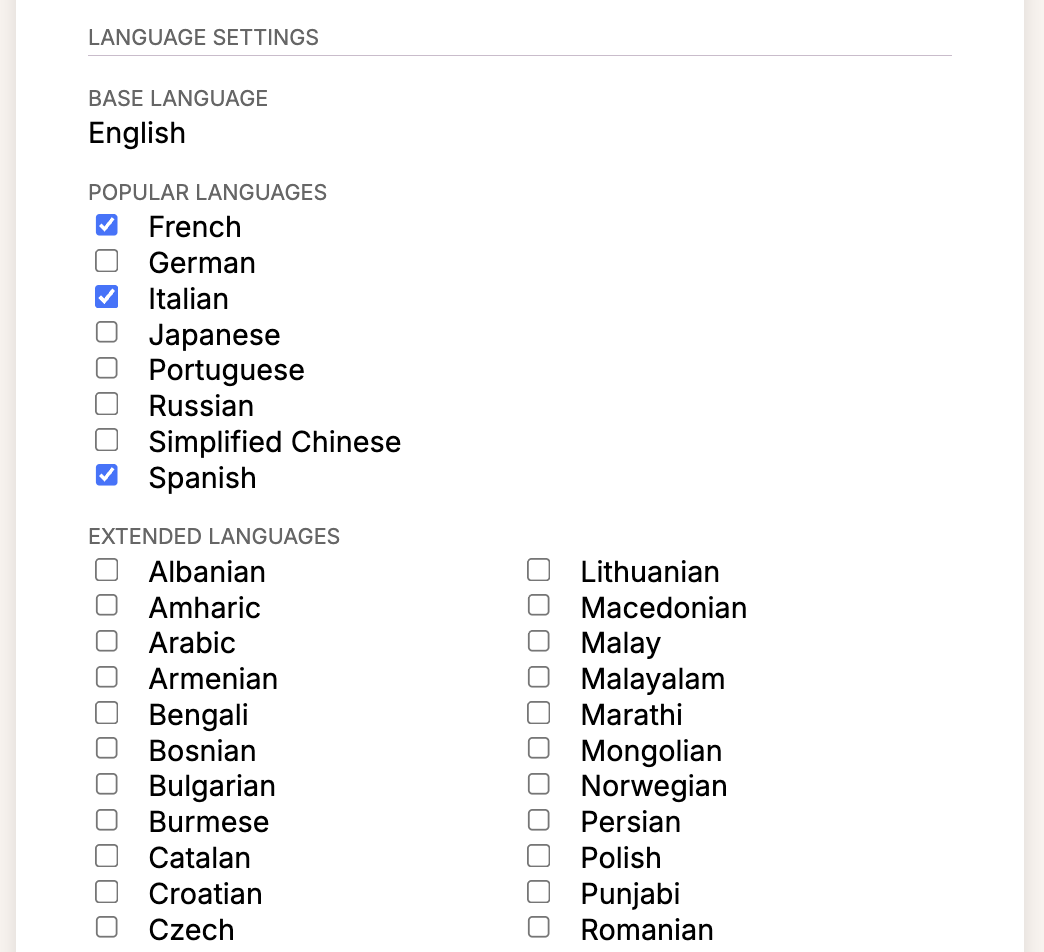
After you have your project set up, head over into project settings and choose from a huge selection of languages. You can add or remove languages at any time.
The languages you choose will determine not only the translations you build, but also the resource files that get synced to your applications as well as the valid set of languages for dynamic translations.
If you're looking for a language that's not available yet, reach out to [email protected] .
Generate Translations
Here's the easy part - let our AI translate your content automatically using our CLI tool.
We're assuming your application is already structured for translation and you have a base language file available. Our CLI tool will automatically locate your base language file and upload it to our server. Then it will translate the rest of the languages and download the translated files to your project.
If your projects is not already set up for translation, you'll need to do that first. Here are some resources to get you started:
First, install the CLI tool:
pip install gettranslated-cli
Next, set up your project: This step is where you'll use your server API key. The easiest way is to use the init command, which will guide you through the setup:
cd /path/to/your/project
translate init
The init command will prompt you for your API key (masked input) and optionally save it to .gettranslated. Alternatively, you can set the GETTRANSLATED_KEY environment variable or use the -k flag with commands.
For detailed instructions on using the CLI tool, see our CLI Quick Start Guide.
Finally, run a sync:
translate syncExample output:
Connected to project My GetTranslated App
Beginning upload...
Syncing Documents/projects/myapp/src/i18n/locales/en.json...
Beginning translation...
Translating Spanish... 100.0%
Translating French... 100.0%
Translating Italian... 100.0%
Beginning download...
Syncing Documents/projects/myapp/src/i18n/locales/en.json...
Syncing Documents/projects/myapp/src/i18n/locales/es.json...
Syncing Documents/projects/myapp/src/i18n/locales/fr.json...
Syncing Documents/projects/myapp/src/i18n/locales/it.json...
Done!
Integrate SDK
Use our SDK to enable dynamic translations in your app. Our SDKs are designed for easy integration and optimal performance.
- Android Quick Start
- iOS Quick Start
- React Native Quick Start
- CLI Quick Start
- MCP Quick Start (Claude Code, Cursor, Codex)
For complete integration guides and detailed documentation, see the Platform Integration section below.
Test & Ship
Test your translated app and ship it to your users. Monitor translation quality and make adjustments as needed.
Testing checklist:
- Test all supported languages
- Verify UI layout with longer text
- Check cultural appropriateness
- Test offline functionality
For complete integration guides and detailed documentation, see the Platform Integration section below.
Platform Integration
React Native SDK
Android SDK
iOS Integration
React Native SDK Integration
Get real-time, AI-powered translations in your React Native app with our comprehensive SDK.
// Install the SDK
npm install @gettranslated/react-native-sdk

// Create a base translation file, and run the GetTranslated CLI to generate the translation files for your languages.
// Your base language file might look something like this:
{
  "hello": "Hello",
  "message_count": "You have {{count}} messages"
}

// Basic setup with TranslationProvider
import React from 'react';
import { TranslationProvider, useTranslation } from '@gettranslated/react-native-sdk';

// Load translation resources. These should be the same languages configured in your project.
import enTranslations from './src/i18n/locales/en.json';
import esTranslations from './src/i18n/locales/es.json';
import frTranslations from './src/i18n/locales/fr.json';

const translationResources = {
  en: { translation: enTranslations },
  es: { translation: esTranslations },
  fr: { translation: frTranslations },
};

// Wrap your app with TranslationProvider
export default function App() {
  return (
    <TranslationProvider apiKey="your-client-api-key" resources="{translationResources}">
      <MainScreen />
    </TranslationProvider>
  );
}

// Use translations in components
function MainScreen() {
  const { t } = useTranslation();

  return (
    <View>
      <Text>{t('hello')}</Text>
      <Text>{t('message_count', { count: props.count })}</Text>
    </View>
  );
}Key Features:
- Real-time translation with automatic caching
- Anonymous user support with seamless login transition
- Automatic language detection and override support
- Offline caching using AsyncStorage
- Full TypeScript support
- Cross-platform (iOS & Android)
- React hooks and providers for easy integration
Android SDK Integration
Get real-time, AI-powered translations in your Android app with our comprehensive SDK.
// 1. Add SDK from Maven Central to your build.gradle
implementation 'ai.gettranslated:android-sdk:1.0.0'

// 2. Initialize in Application class
import ai.gettranslated.sdk.GetTranslated;

public class MyApplication extends Application {
    @Override
    public void onCreate() {
        super.onCreate();
        GetTranslated.init(getApplicationContext(), "your-ck-api-key");
    }
}

// 3. Use in your activities
String translated = GetTranslated.getDynamicString("Hello, World!");

// Or with callback for async translations
GetTranslated.getDynamicString("Hello, World!", new GetTranslated.TranslationCallback() {
    @Override
    public void onTranslationReady(String translation) {
        runOnUiThread(() -> {
            textView.setText(translation);
        });
    }

    @Override
    public void onTranslationError(String errorMessage) {
        // Handle error
    }
});

// 4. Language management
GetTranslated.setLanguage("es"); // Switch to Spanish
Set<String> languages = GetTranslated.getLanguages(); // Get supported languagesKey Features:
- Real-time translation with automatic caching
- Anonymous user support with seamless login transition
- Automatic language detection and override support
- Offline caching using SharedPreferences
- Memory safe with ApplicationContext usage
- Cross-platform consistency with other SDKs
- Comprehensive logging for debugging
iOS SDK Integration
Get real-time, AI-powered translations in your iOS app with our comprehensive SDK.
// 1. Add via Swift Package Manager
// In Xcode: File → Add Packages... → https://github.com/get-translated/ios-sdk.git
// Or via CocoaPods: pod 'GetTranslatedSDK', '~> 1.0.0'

// 2. Initialize in AppDelegate
import GetTranslatedSDK

func application(_ application: UIApplication, didFinishLaunchingWithOptions launchOptions: [UIApplication.LaunchOptionsKey: Any]?) -> Bool {
    GetTranslated.initialize(key: "your-ck-api-key")
    return true
}

// 3. Use in your view controllers
let translated = GetTranslated.getDynamicString("Hello, World!")

// Or with callback for async translations
GetTranslated.getDynamicString("Hello, World!") { translation in
    DispatchQueue.main.async {
        label.text = translation
    }
} onError: { error in
    print("Translation error: \(error)")
}

// 4. Language management (optional - SDK handles automatically)
GetTranslated.setLanguage("es") // Switch to Spanish
let languages = GetTranslated.getLanguages() // Get supported languagesKey Features:
- Real-time translation with automatic caching
- Anonymous user support with seamless login transition
- Automatic language detection and override support
- Offline caching using UserDefaults
- Swift Package Manager support
- Cross-platform consistency with other SDKs
- Comprehensive logging for debugging
Best Practices
-
Review All Translations
Always review AI-generated translations before shipping to production. Human review ensures accuracy and cultural appropriateness.
-
Use Translation Memory
Leverage translation memory to maintain consistency across your apps.
-
Use Protected Words
Leverage protected words to prevent brand names, trademarks, and other important words or phrasesfrom being translated.
-
Test with Real Users
Test your translated app with native speakers to ensure the translations work well in context.
-
Plan for Text Expansion
Some languages require more space than others. Design your UI to accommodate longer text.
-
Initialize SDK Early
Initialize the SDK as early as possible in your app lifecycle (e.g., in Application.onCreate() for Android or AppDelegate for iOS). This ensures translations are ready before your UI loads and language preferences are applied correctly.
-
Handle Errors Gracefully
Always provide fallback text when translations fail. Use error callbacks to handle network errors and show the original text as a fallback. Implement retry logic for transient network failures.
-
Secure Your API Keys
Never commit API keys to version control. Use environment variables, secure configuration files (like .gettranslated), or your platform's secure storage. Add configuration files containing keys to .gitignore.
-
Leverage Offline Caching
The SDK automatically caches translations locally. Pre-load critical translations during app initialization to ensure they're available offline. Test your app's offline behavior to ensure a smooth user experience.
-
Use Async Translations for UI
Use callback-based or async translation methods for UI updates to prevent blocking the main thread. Show loading states while translations are being fetched, especially for dynamic content.
-
Validate Language Support
Before setting a language, check if it's supported by your project using getLanguages(). This prevents errors and provides a better user experience. Persist user language preferences across app restarts.
-
Test All Supported Languages
Test your app with all languages you've configured in your project. Verify UI layout, text rendering, and cultural appropriateness. Don't forget to test offline scenarios and error handling for each language.
-
Optimize Performance
Batch related translation requests when possible. Pre-load critical translations during initialization. Use the SDK's built-in caching rather than implementing your own caching layer unless you have specific requirements.